Thursday, June 30, 2011

Cutting Cafe/Elephant Shape Card


Happy Thursday. I decided I would give it a try to cut out one of the precious shaped cards from Cutting Cafe. I have some serious arthritis in the hands and I am not really efficient at cutting the shapes out...and so far I don't have the software to have my die cut machines to do the job. Mostly when you see me do one of Regina's lovely printables, it's a sentiment based card. However, here is the elephant shaped card. I embossed her, added a pink heart and a pink ribbon and the inside says "Don't forget I love you". I will send this to my son and daughter in law. You can see the set at Cutting Cafe right here.


Monday, June 27, 2011

BBTB2/Watermelon/BlogHop

A BLOG HOP WINNER: Thanks to Treva for joining in on our month end blog hop. Treva, you have won the draw for the little embroidery heart tote. Please email me quickly so I can make arrangements to send you the tote. Thanks to everyone who came to visit and leave a sweet comment and join in on our month end BBTB2 blog hop.


Heather is not only our Leader in all things BBTB2 but she is our hostess for this blog hop challenge. She selected Stretch Your Imagination as the cartridge and we were asked to design with the watermelon cut. I love SYI, it has fun fun cuts on it and although I didn't use the "stretch" option on this card, I have used it many times and always love the end results.
Hopefully you started out at Bitten By The Bug2 blog site so you can see all of the projects submitted by our team for your inspirational viewing. In the typical blog hop fashion, I hope you have come to my blog by the way of Carri V.
Here is my card. I cut three regular shaped watermelons and then to give each a wee bit of blitzy difference I used an oval Nestie to get the light rind. And of course the watermelons have been embossed. I cut the title from Blackletter and everything was set upon various layers of cardstock and pattern papers. The cute red and white polka dot paper, however, lost its pattern when I applied the "melon" mount. A gold star was added for no other reason than to break up all that red and green.


In the fun of it all, now I ask you to visit Shelly's blog to see what a cute project she has in store for you. You can see her blog right here.

Now for the blog candy part of the month end blog hop. Today I am offering up another little tote which is sewn with pillow ticking fabrics of white and light blue. In the center I have embroideried a pretty heart design, and there is a red and white polka dotted ribbon at the top front. The tote is lined with dark blue fabric. Please leave a comment if you wish to be in the blog candy draw which I will do on July 1st after 2:00PM. Please check back and if your name appears as the winner, please email me quickly so that I can make arrangements to mail your gift. If I do not hear from the winner by July 3, I will draw another name.


Also we would love it if you would join in on our watermelon challenge. You don't have to have SYI, just use any watermelon cut in a new project, connect it to our blog thru Mr. Linky AND be sure to mention on your blog that you have entered the challenge. Often I see cards linked but when I visit the blog to say thanks for joining our challenge , there is no mention at all that the card was shared with our challenge.

Thursday, June 23, 2011

Cutting Cafe/July 4th

July 4th is a special day for many reasons.... one more reason - - my darling daughter in law has a birthday on July 4th....I love Regina's July 4th stuff. Oh heck, I love anything Regina's Cutting Cafe. Here are two cards that can be found in the set right here.
Recipe: Cutting Cafe: July 4th Printables here.
Cricut: Stamping (Star) Independence (1776)

Tuesday, June 21, 2011

RIP Heidi SweetFace 1997-2011

My Heidi Sweetface was put to sleep this morning and I cannot even begin to express my sadness. She was a sweet dog who loved me, loved visitors, loved treats and kept me company each day. She turned 14 on February 1, 2011 and her age started to show. Her back legs were stiff, she was deaf but there was always that House Guard Heidi when a cat would sashshay past our patio window. Last night was the night that sweet Heidi's body began to say "let me go, I will be fine". I am not fine. No no no, I am not fine.
Heidi on her 13th Birthday

Monday, June 20, 2011

BBTB2/Cloud

Our lovely talented hostess this week is Susan. She asked us to design from Celebrate With Flourish and to use the cloud cut. My Gypsy has never allowed me to load CWF and when I tried again, I was told to update my Gypsy ... I did so and after 2 hours of the upload gauge still clocking in full upload mode and a message that said not to shut down the Gypsy, I finally decided I was going to wing it. I found that I could discontinue the upload on the computer but my Gypsy would not shut off so I resorted to the reset button and I was greatly relieved to find it worked and shut the G down. (Whew).... I went to the Expression to see what had worked and I was told to now update the Cricut from the Gypsy. Everything seems to be ok and my Gypsy could now recognize some of the newer carts I had purchased BUT the Celebrate with Flourish was not loaded, and when I tried the old method of just cutting direct from the cart in the Expression, the E was telling me "cart error". Sigh.... People ask me why I have an Expression and two Baby Bugs. This is why. I had a lovely backup which allowed me to cut the selected challenge.

I had some lovely double sided papers in the scrapbins so this card was created using those papers. I embossed the cloud and the sun and the sentiment. I popdotted 3 layers of the circle part of the sun....and since this was a bright sunny day, I added 6 jewels.
I used my cute little Brother sewing machine just used for paper sewing and zig zagged around the one paper mount.
A bright bright sun indeed....
Recipe: Cricut: Celebrate With Flourish
(Sentiment, Sun and Cloud)
Papers: Scrapbin
Embossing Folder: Swiss Dots
Jewels
Thanks for stopping by. The design team sisters always do such wonderful creations on our challenges and I know you are inspired. Please join in on our challenge with a new creation using the cloud and please mention on your blog that you have entered your card to our BBTB2 challenge.

Friday, June 17, 2011

Cutting Cafe/Butterflies

I love butterflies....and I certainly do love anything Cutting Cafe. So when Cutting Cafe does butterflies, well that's a winning ticket. Here is a card I made that was so so simple. The butterfly is cut from (perhaps) Indie Art. It actually was in my famous box lid where all extra cuts land.... So I grabbed it up, and added a cute little Cutting Cafe circle sentiment. The base card is pattern paper cut with a Nestie shape. .... and most everything is embossed. I added the black body on the butterfly. TFL....and if you would like to see the Cutting Cafe set, please butterfly-flit right here.

Monday, June 13, 2011

BBTB2/Gnome

Happy Monday.... almost the middle of June already and I was just saying "oh my, it's June 1st". Theresa is our wonderful BBTB2 hostess this week and she asked us to design with the Gnome on Freshly Picked. I hope you have come to call from the BBTB2 blog where enjoyed the wonderful creations from our design team. I didn't have Freshly Picked cartridge and I couldn't find a gnome on any other cartridge.... so Theresa gave some additional options. We could use a bird bath, we could alter an elf.... ...and that is what I did. I went to Paper Dolls Dress Up and I cut the basic body shape.... then I hopped over to Santa's outfit and cut the beard, the clothing came from one of the other PPDU options and the hat is from the Witch. I cut a birdhouse from Independence Day Seasonal... The fence and bird I believe are from Happy Hauntings but actually I grabbed this up from a box lid of spare dies and that is also true of the shaped frame. I added some strips of green and some punched flowers.
These little fellas are guardin' the garden.... And they don't seem to mind that they really don't resemble a true gnome.

The inside has a little poem.

Thanks as always for stopping by and if you leave a comment, I will love it.

Sunday, June 12, 2011

Cutting Cafe Monthly Inspiration

Monday, June 13 is the Cutting Cafe Monthly Inspiration. So many wonderful projects will display for your inspiration. We are told that a new set, Tie-riffic Dad, will be released so be sure and check for this wonderful new set. There might be a free offer, so check it all out right here.

My project for the inspiration is a note pad cover. I chose to use the wonderful background printable that says Father, Dad, Papa and many other endearing titles , a classic automobile printable and one of Regina's great printable sentiments. I have embossed the mounts, and the brown decorative star was cut from Stamping Cricut cartridge.


The inside cover has a pocket so that you can slip in envelopes, notes, or other papers.
TFL, and do do do visit Cutting Cafe for the designer creations which I am sure will inspire you.

Thursday, June 09, 2011

Cutting Cafe/DAD

A three letter word that is said with so much love. Here is a simple card I made using two of Regina's Cutting Cafe printables, You can see the shirt and tie set here. The printable letters can be seen right here.
Sadly my father passed away many years ago but the memories of having a wonderful father never leave me.

Monday, June 06, 2011

BBTB2/Pooh&Friends/Cloud

Happy Monday my dear sweet visitors.. Today our hostess at BBTB2 is sweet Shelly who asked us to design with the cloud on Page 39 from the Pooh & Friends cartridge. I do not have that cartridge but we can design our projects with any ole' cloud so I went to my newest cart, April Showers. Such cute little images this cartridge has given us. I decided that a pretty scene of a wonderful spring day would be my design....with the frothy swirly clouds floating by, a lovely bright yellow sun, some flowers and of course a watering pail. I cut the flowers and the water pail from April Showers as well, the sentiment letters are from Cindy Loo. The sun cut was grabbed up from one of the Box Lids. And I went heavy on the glorious embossing as well. Some bling was added to the flower centers and along the rim of the pail. Please join us in our cloud challenge. Link your creation up to our BBTB2 blog, and be sure to mention on your blog that you are submitting to our challenge.... we kinda like that bit of fame.... TFL...


Saturday, June 04, 2011

Cutting Cafe/Bingo Cards


If you are checking in on the BBTB2 blog hop, please scroll down. The drawing is tomorrow so you still have time to get into the running for the little red book tote.
Meantime..... here is a card I made using Regina's Cutting Cafe set called Bingo Card Month Set and you can see it right here.
The card is made up of several elements I just grabbed up.... those are the most fun to make.
I had a packet of vellum quotations so I thought this "live for today" snippet was just the ticket for cards showing some months of the year. I had a sheet of stickers for silver wings of all shapes. I had been saving this for just the right moment and this card was it.... I added the Cutting Cafe month cards, then I used my Blackletter cartridge for some of the sentiment.
I believe that the word "flies" may have come from Calligraphy Collection. I love how this card turned out.... I hope you do too. TFL, and as my friend Jeannie says "I thrive on your comments". Truly.


Monday, May 30, 2011

BBTB2/Celebrations/Cake

The Blog Candy winner is.........JESSICA. I will get the necessary info and get the little red book tote mailed out this week. Congrats, Jessica, and to each one of you who left a sweet comment, thank you so much. I appreciate everyone ....

Happy Monday....can you believe May is just a few days from being over and we will be in the month of June.
Welcome to the end of month BBTB2 blog hop. I am the hostess for this blog hop and I selected Celebrations cartridge for the die cut, and I asked the gals to design with the birthday cake. I love this little cake. I cut the candles from Celebration cart as well but I hand colored them with my Copics just to give 'em a wee bit of oomph. I used some MS edge punches for scallops, I embossed almost everything, and the sentiment is a rubber stamp. A sweet little blue bow has been added for a final embellishment. I believe I am the first stop on the blog hop and from my blog please hop over to Donna's wowzer blog to see her take on our birthday cake challenge. Click right here for Donna.
Please join us in our cake challenge. You can use any cake from any cartridge. When you link your blog with the challenge entry, be sure to tell everyone that you are joining the BBTB2 challenge.
Now...here is my blog candy. It's one of my little totes I make with some left over fabrics. This tote is about 7-1/2 long and 9-1/2 inches wide. Not big but this would be a cute little tote for a little girl who likes bright red and colorful flowers. Leave a comment and on June 3rd I will do a random draw. I will post the winner after 2:00PM that day so check back for the name.
Please contact me no later than June 5 so I can make arrangements to mail the tote ....if I don't hear from the winner by June 6, I will do another draw.
Thanks so much for visiting. Hope you have a splendiferous week. I plan to.

Saturday, May 28, 2011

Cutting Cafe/Tooth Fairy

I don't think there is enough time in the day to do everything that I want with the Cutting Cafe printables. Oh that Regina, she gives us so many wonderful images and sentiments to create with. One of the new printables is Tooth Fairy Box. How cute an idea is THAT?.... You can see this set right here.
Anyway in one of my dresser drawers there is a plastic container with all of my son's baby teeth. I've looked at the little container many times over the years when I have had need to rummage around in my old old jewelry box and I always say aloud, to no one in particular, "I gotta do something better with these". I can remember each time he lost a tooth so this little plastic do-dah holds some mighty wonderful memories. Along comes Regina with a great printable. Here are two boxes, one girly, one boy...and of course the boy Tooth Fairy Box will replace that silly plastic container.

And just cuzzzz I loved making these, I made a few more. I used a very simple box cut ....cut the cardstock 6x6 and scored all four sides at 1-1/2 for the box, and 1-1/8 for the lid. I love the little Cutting Cafe sentiments and images so they are here and there on the boxes... I cut some 2-1/2 inch envies from Calligraphy cart, applied one of the circular toothy sentiments on the front and each box will have about 5 envelopes like these.
TFL.... I think this printable is just the cutest thing evahhhhhhh.


Friday, May 27, 2011

Cutting Cafe/All About baby

I am in the Box Lid Card Frenzy mood again. I MUST get that studio tidied up. I keep everything...every little tidbit of paper and each die cut that I hadn't use for something....and then suddenly I am aware that I am surrounded by stacks. When that happens, you see these posts of cards that I put together in nothing short of a record ... I found the Cutting Cafe pile of the darling little round sentiments. "Cute As A Button" can be used on so many cards...babies, pets, children growing up. I had one sentiment that I did myself on the computer.... I cut some faces from New Arrival. I used the blackout cut and drew in my own face, and I added a MS bow punch ... then I grabbed up the chipboard button designs, added a wee bit of tied twine and the cards were done. You can see the set from Cutting Cafe right here. It's a cute one. Go see....

Monday, May 23, 2011

BBTB2/Florals Embellished/Flying Bird

Donna, oh that super talented gal, is our hostess for BBTB2 this week. She has chosen the Florals Embellished cartridge, and the flying bird on page 61. I don't have that cartridge...and in fact somehow the existance of it escaped my scrutiny. At any rate, I found a flying bird on Indie Art. I cut three bright and colorful birdies, cut a moon, some stars a cloud, added some jewels to the stars and cloud, a few on the blue bird and called this creation "girls night out". ... Little Blue Bird with all her bling seems to be the leader and I am sure this flying trio will have a great night in the sky.
Hope that you all have been able to visit all of the design team blogs and see the wonderful project they offered in this challenge. And I hope that you will join in on the challenge. You don't have to have the cartridge selected...just pick a bird, flying or not. And be sure to mention on your blog that you are entering the BBTB2 challenge.

Sunday, May 22, 2011

Cutting Cafe/Belated Birthday Wishes

Whenever I have a card idea rattling around in my head, I automatically hover over Cutting Cafe printables to close the deal. These two cards are a result of finding 2 little unfinished elephant die cuts .... I believe these darlings were cut from Sugar N' Spice. Elephants are supposed to remember everything but these little cuties forgot birthdays. You can see the set right here.

Recipe:
Cricut: Sugar N' Spice
Sentiment: The Cutting Cafe
Cuttlebug Embossing Folders
Pattern Papers

Thursday, May 19, 2011

Cutting Cafe/Calendar Set...


I LOVE this set and I have made a lot for friends who delight in receiving them. You can be sure that when January 2012 arrives, I will be Susie-On-The-Spot with a new year's set for all my friends. This is the second post for this particular Cutting Cafe printable. Everytime I repeat a project, they just seem to turn out all brand new because of different papers and embellies.
You can see the set here....


Monday, May 16, 2011

BBTB2/ForeverYoung/Sunglasses

Heather is the hostess this week for our BBTB2 challenge. She asked us to design with the sunglasses on the Forever Young cartridge. I really have a lot of fun when I pull up the FY delight....it has great cuts and among them the wonderful sunglass diecut.
I used FY for all of the the cuts on my card. The sentiment "chic" is artfully shaped, and I love the cute little silhouette girlie with the red jewel on her belt. My sunglasses were set upon with a wee bit of red jewel bling. I've added ribbons and most of the card has been embossed. Thanks to Martha for the edge punch.

Where were these sunglasses in the fifties when I wore wild and crazy sunglasses?
Here's a close up of chickie girl with the blingy belt.
TFL. Do join in our challenge. You don't have to have Forever Young.... any sunglasses will do. Link your card up to BBTB2, and be sure to mention that you are joining in the BBTB2 challenge.

Cutting Cafe/Cupcakes.

Woot Woot..... another wonderful giftie from Regina and The Cutting Cafe is being offered. A while back I posted a card I did using one of her new cupcake files. You can see my blog card right here. Here's the cupcake scoop! Regina is having the Monthly Inspiration with darling projects and cards done by the designers. This month you can win ay 3 sets from The Cutting Cafe by leaving a comment and you can also buy one get one free of equal or lessor value on all of the sets offer. Not kidding...what a deal because The Cutting Cafe rocks when it comes to darling printable images and sentiments. The offer is good until Wednesday May 18 at midnight. See the fine details at The Cutting Cafe here.

Saturday, May 14, 2011

Spring Cards

Many of us got emails from one of the companies that sell Cricut carts and this offer had a free Your Story if you bought a cartridge. I have a Your Story and I love it, but I have a friend who pays big money for little digital scrapbooks so I thought how great it would be if she had a machine that could do a few for her.
I bought Cindy Loo and April Showers. Once everything arrived I could not wait to get those carts into play. I had some 12x12 sheets of printed cardstock that had the words "spring" across the center. I cut the pages down so that I could fold them in such a way that the panel of words would end up on the edge. I was able to make 4 cards....and since I used the printed papers for the cards, the inside is a lovely robin's egg blue.
Cindy Loo has darling images and so does April Showers....and on the AS cart I went right to that sweet little birdie in a cage. I thought about making a blue bird but the birdie just sort of disappeared into the paper. I did the first cut at 2 inches, using green paper. The second cut was yellow. The overlay for the bird was yellow and I did some distressing with yellow chalk inks for a little definition. I added a little punch daisy and leaf, and on one card I added a sentiment from April Showers. I had already cut some garden boots in blue with a pink overlay so I added those on two of the cards. Quick and easy cards and they will make a cute gift pack.
I LOVE the alphabet section of Cindy Loo.. I have most of the alpha carts and I really like each one ...I find that I mostly use Mickey Mouse Font or Don Juan for my letterings but now I have a new fave.... Cindy Loo. I had extra sets of photos from the County Fair and my blue ribbon quilt as well as a set of photos taken of the Porch Cat, Tabby... Just for giggles I got my Your Story up and running. I bound the two sets in the little 4x6 binders. The titles are the darling Cindy Loo cuts. Thanks for taking a peek at my fun little last minute projects.

I

Wednesday, May 11, 2011

Cutting Cafe/Cars

Regina has a cute cute printable set featuring cars and quips. There are so many instances the printables can be used. I selected this red car and out of the numerous sentiments, I selected "You're Going Places"....I added a rubber stamp that says "Adventure" and I shall use this for a graduation card. Take a peek at Regina's car printables right here.


Monday, May 09, 2011

BBTB2/Simply Charmed/Strawberry

Oh so talented Jeri is our hostess at BBTB2 this week and she chose Simply Charmed as the cartridge. We were asked to design with the strawberry. We would love to have you join in on our challenge, and remember...you don't have to have Simply Charmed. Use any cartridge that has a strawberry. Please remember to mention on your blog that you have entered your card in the BBTB2 challenge.

For my base card, I used a 5x7 size. I cut away half of the front fold so that the main design could "hang" from a sturdy upper card strip. I strengthened this upper "flap" by adding a red scallop strip, a white scalloped strip and some pattern paper. I cut 4 strawberries; 3 small, and one larger for the focal point. The title is also from Simply Charmed. Everything has been embossed with the Cuttlebug. Finally, I added a green jewel on the leafy stem.

I hope you have viewed all of the cards from the design team. If you haven't as yet, just click here and you can see the cards. The team is so so talented, and I love how each of us on the team has their own take on the challenge.

Thursday, May 05, 2011

Making Pretty Boxes

You've heard me speak of and show my "box lid frenzy" creations which is where I attempt to empty out the lids of extra small papers, die cuts and sentiments. I also have a "box frenzy". I love making little boxes and fortunately I have a friend who loves getting them to gift out.
Here is a stash that she will pick up tomorrow, along with a big sack full of little totes and handsewn items she will give to the Open Arms Orphanage in Africa. Like anything I dive into, once I am making these boxes, I find it hard to stop... With each paper change, it is like making a new box all over again. I add flowers, stars, sentiments...ribbons, brads.


Here is how I do this: You can use any size of paper you like but for purposes of this tutorial, I am using paper cut 8x8. In this instance I selected a wonderful pink pearl 8-1/2x11 cardstock and this makes a sturdy gift box. I cut two 8x8 bases. On the first I score on all four sides at 2 inches. This is the box itself....The score lines will make the flaps on the box. The second box base I score at 2-1/8th inches. This will make the lid.

Fold up at all score lines. Use a bone folder to make a nice crisp fold.
On the box and box lid you will make cuts on the two sides opposite each other. Cut up to the score line. This will create flaps that you will fold up and glue inside to form the box. Do not cut on all four sides of each as this will cut away the part of the flap you need to glue inside the bases. (However, if you should cut away that small flap, fear not. You can save the project by creating an outside decorative flap to glue each panel and create the necessary flaps.
I fold down all 4 of the smaller flaps and swirl some glue. I find it is easier to glue everything so that when you start to fold the box together, it is uniform.
Pull up the flaps, place the smaller cut flap inside, line it up all edges and hold to secure the glue. I have also used double sided tape but I feel glue is a wee bit more secure.
Here is a finished box and a tag to accompany. The tag comes from the extra paper I cut away from the 8-1/2x11 cardstock. The flower is a simple punch in several layers, and two buttons for the center. I added some Nestie corners just cuzzzzzzz.
I am always thrilled to give my box creations to Patty and I had a lot of fun making them.
TFL

Wednesday, May 04, 2011

Cupcake At The Cutting Cafe

Who doesn't love a cupcake?.... I certainly do. Paper cupcakes are fantastic. They are not only so pretty to behold but they are wonderfully calorie free. This cute card shaped cupcake is from The Cutting Cafe. I love the larger cuts, and instead of creating an entire card with the printable, I mounted it on a card base. The decorative edging is from an EK Success Edge Punch. That big fat ribbon was in my Big Ribbon Jar. (I love ribbon, ...I have two big big trays of ribbons, and I had a huge jar of smaller bows and made up ribbon styles and I have a big jar of ribbons that came from packages.) I put the cupcake wrapper through one of my Cuttlebug embossing folders, and of course everything else has been embossed as well. The sentiment is a clear stamp. TFL.... and if you want to see more of the darling cupcake printables, check out The Cutting Cafe right here.
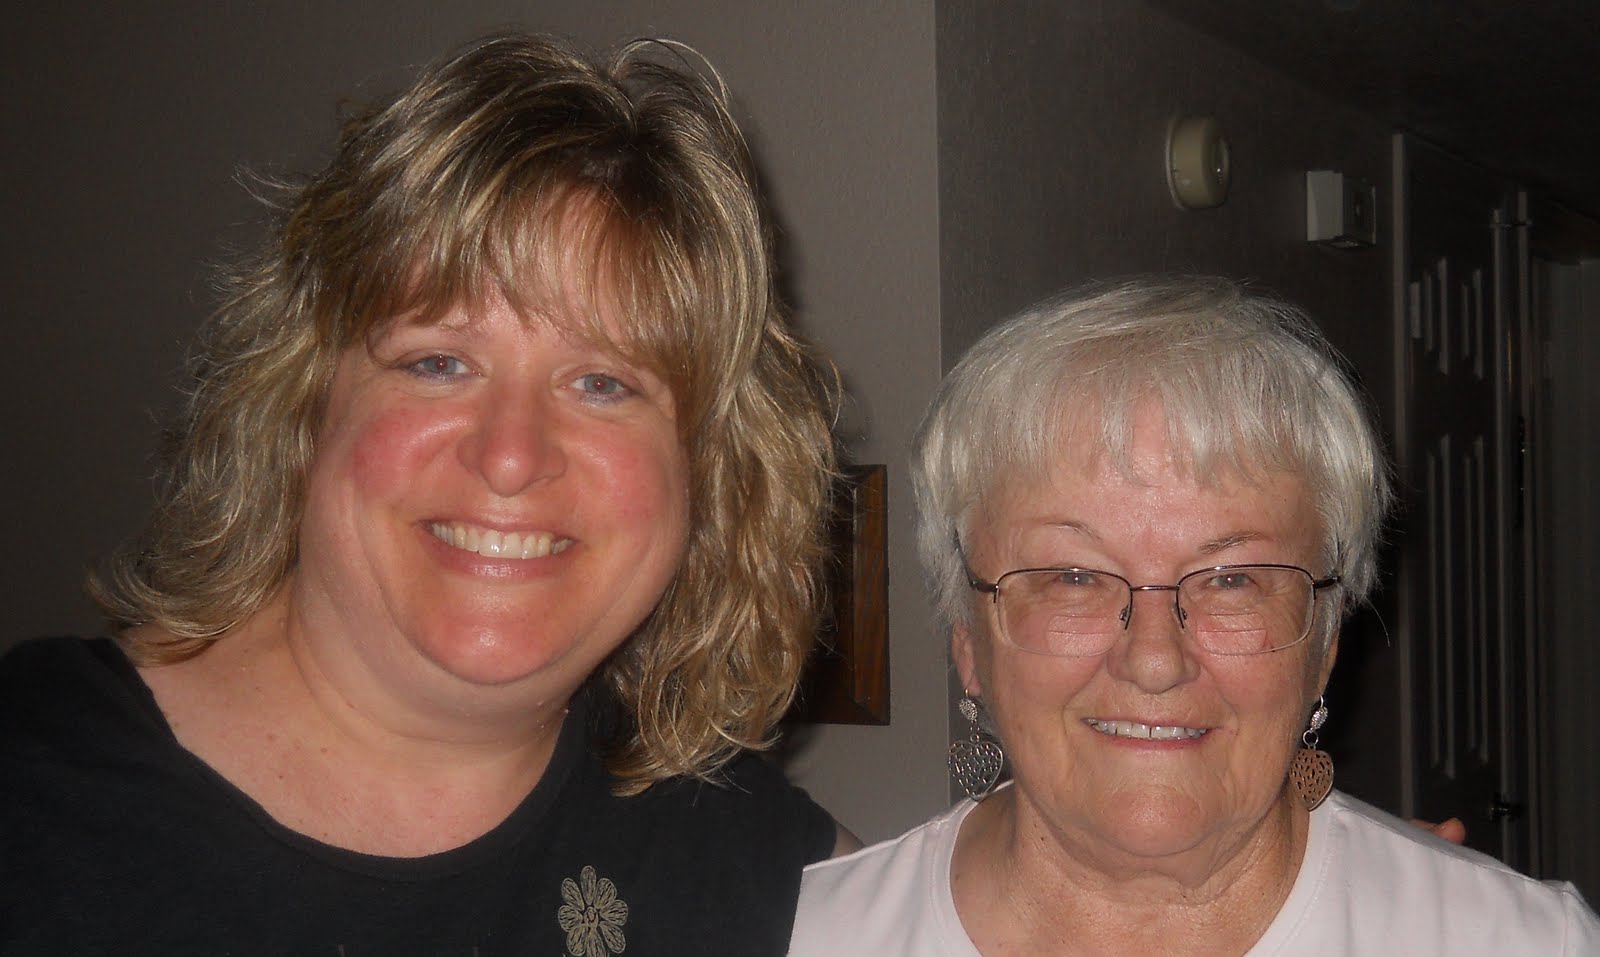
Last week I was absolutely thrilled to be able to visit with my friend Carol Sheetz, her two darling daughters and her mother in law. I was happy that Carol could wedge in a visit during their busy trip to AZ. This is the second time Carol and her family have come to see me and let me tell you, to have a bloggy friend face to face is pretty exciting. Here is the pix of Carol and I.
Now if I can just visit face to face with my many other cherished bloggy friends.

Monday, May 02, 2011

BBTB2/Preserves/Apple

Our talented and loved BBTB2 leader, Heather, is our week's hostess. She asked us to design from the Preserves cartridge and to use the apple core die cut. I do not have that cartridge so I went to my much loved Doodlecharms cartridge and cut the apple. I love this cartridge...it has everything.
Here is my card.

I cut a Nestie opening in the front of the base card and placed the apple mid-center. I found some cute red with white polka dot paper, cut the sentiment from Blackletter and created the card.
We love it when you join in our challenges. We can use any apple so find a cartridge, make a card and do enter our challenge. Please be sure to mention that you are joining in on the BBTB2 challenge. Thanks for stopping by.
Recipe:
Cricut: Doodlecharms, Blackletter
Nestie (card front opening)
Doodling
Rubber Stamp

Monday, April 25, 2011

BBTB2/HomeDecor/Crown

Our talented BBTB2 hostess this week is Julie. She asked us to design from Home Decor and to use the crown. I hate to admit this but I put this card together in about 2 minutes using papers and sentiments that were laying in one of my well-known box lids. The Crown die cut was also in the box lid and I cannot find which cartridge I cut from. For 2 weeks now I have been once again on a tangent to get those lids cleared out and so far I've made about 120 simple cards. The paper is from a doggy themed pack and the cute dog with the alert little ears is an image I cut out from another part of the paper. The sentiment is from Paper Pups. I've pop dotted the doggy house, the cute little dog and the crown...and of course I added some bling to the crown and the collar. Hope you've taken a glance at the BBTB2 blog to see the design team contributions to our challenge and I hope that you will do up a card and post it on our blog to share. Please mention that you are sharing the card for the BBTB2 challenge.


Thanks for looking, thanks for stopping by and if you've left a sweet comment, many many thanks. I appreciate you.

Saturday, April 23, 2011

Box Lid Frenzy

Ah, the famous stack of box lids containing paper parts, die cuts, sentiments and "stuff".... Now and then I attack those lids and start putting together simple cards. I tell myself when I have extra things to take the time and make a card right then instead of tossing the spare parts in those lids. But soon the lids are full again and here is my latest "attack". If I find 4 die cuts I make 4 cards with that die, and you will see that in some instances I found 10 or so stamped sentiments and those became cards. Basically I pull out a die cut, grab some papers, a sentiment and the card is formed just using stuff laying around. It's fun and I accomplish a lot in a short time.