Thursday, May 05, 2011

Making Pretty Boxes

You've heard me speak of and show my "box lid frenzy" creations which is where I attempt to empty out the lids of extra small papers, die cuts and sentiments. I also have a "box frenzy". I love making little boxes and fortunately I have a friend who loves getting them to gift out.
Here is a stash that she will pick up tomorrow, along with a big sack full of little totes and handsewn items she will give to the Open Arms Orphanage in Africa. Like anything I dive into, once I am making these boxes, I find it hard to stop... With each paper change, it is like making a new box all over again. I add flowers, stars, sentiments...ribbons, brads.


Here is how I do this: You can use any size of paper you like but for purposes of this tutorial, I am using paper cut 8x8. In this instance I selected a wonderful pink pearl 8-1/2x11 cardstock and this makes a sturdy gift box. I cut two 8x8 bases. On the first I score on all four sides at 2 inches. This is the box itself....The score lines will make the flaps on the box. The second box base I score at 2-1/8th inches. This will make the lid.

Fold up at all score lines. Use a bone folder to make a nice crisp fold.
On the box and box lid you will make cuts on the two sides opposite each other. Cut up to the score line. This will create flaps that you will fold up and glue inside to form the box. Do not cut on all four sides of each as this will cut away the part of the flap you need to glue inside the bases. (However, if you should cut away that small flap, fear not. You can save the project by creating an outside decorative flap to glue each panel and create the necessary flaps.
I fold down all 4 of the smaller flaps and swirl some glue. I find it is easier to glue everything so that when you start to fold the box together, it is uniform.
Pull up the flaps, place the smaller cut flap inside, line it up all edges and hold to secure the glue. I have also used double sided tape but I feel glue is a wee bit more secure.
Here is a finished box and a tag to accompany. The tag comes from the extra paper I cut away from the 8-1/2x11 cardstock. The flower is a simple punch in several layers, and two buttons for the center. I added some Nestie corners just cuzzzzzzz.
I am always thrilled to give my box creations to Patty and I had a lot of fun making them.
TFL

Wednesday, May 04, 2011

Cupcake At The Cutting Cafe

Who doesn't love a cupcake?.... I certainly do. Paper cupcakes are fantastic. They are not only so pretty to behold but they are wonderfully calorie free. This cute card shaped cupcake is from The Cutting Cafe. I love the larger cuts, and instead of creating an entire card with the printable, I mounted it on a card base. The decorative edging is from an EK Success Edge Punch. That big fat ribbon was in my Big Ribbon Jar. (I love ribbon, ...I have two big big trays of ribbons, and I had a huge jar of smaller bows and made up ribbon styles and I have a big jar of ribbons that came from packages.) I put the cupcake wrapper through one of my Cuttlebug embossing folders, and of course everything else has been embossed as well. The sentiment is a clear stamp. TFL.... and if you want to see more of the darling cupcake printables, check out The Cutting Cafe right here.
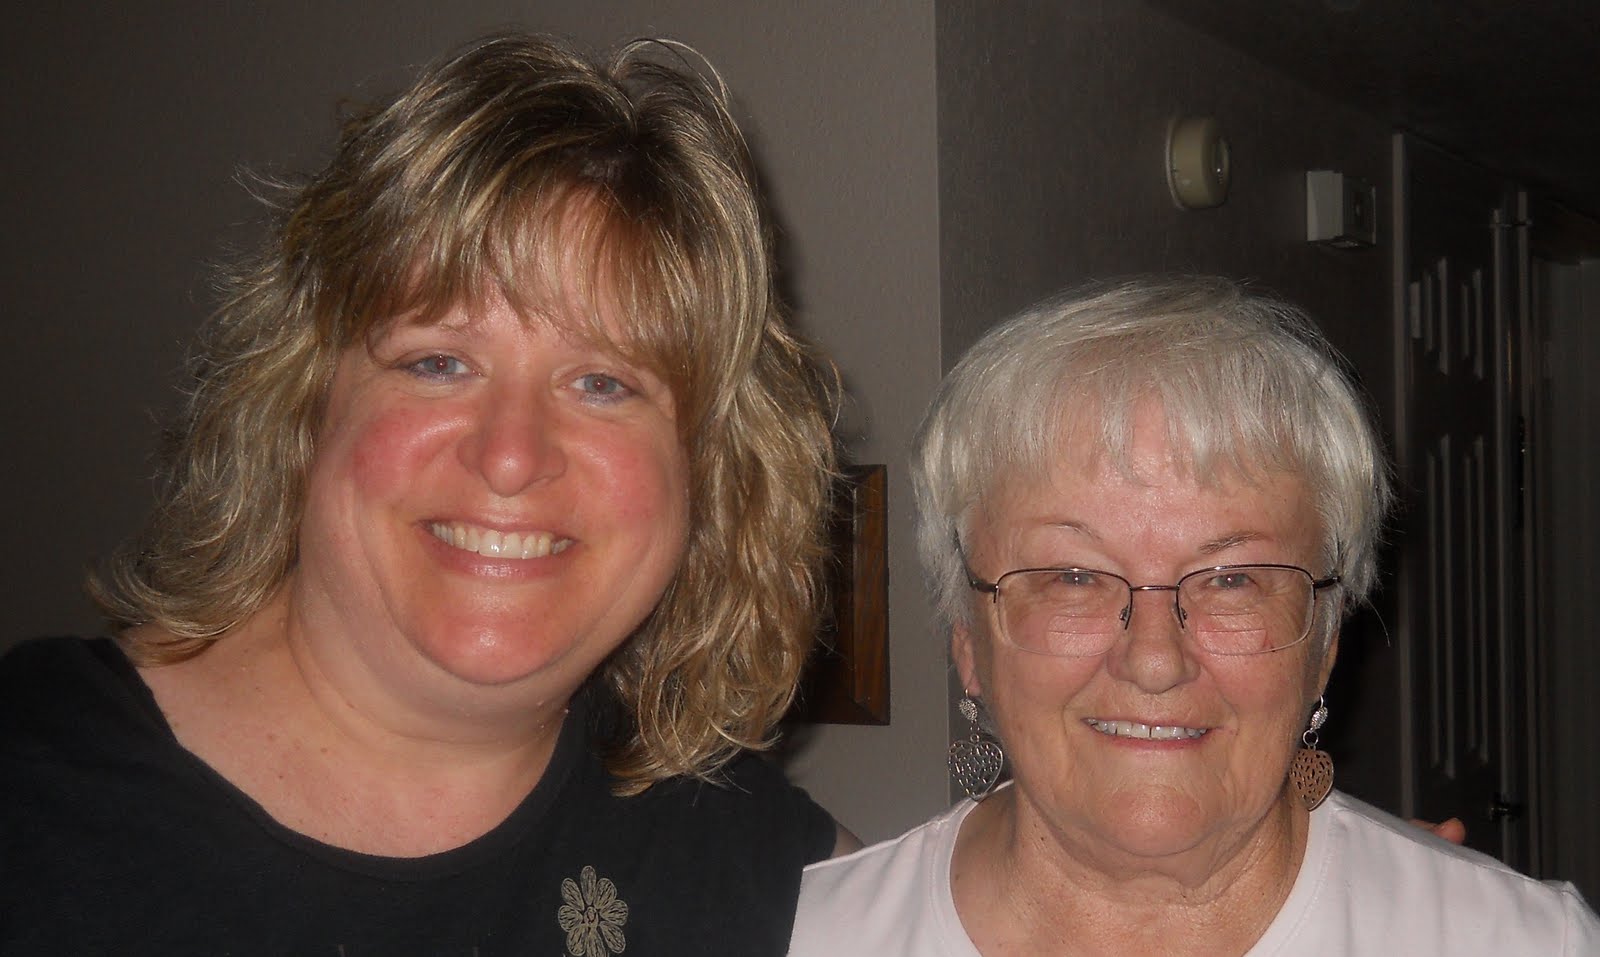
Last week I was absolutely thrilled to be able to visit with my friend Carol Sheetz, her two darling daughters and her mother in law. I was happy that Carol could wedge in a visit during their busy trip to AZ. This is the second time Carol and her family have come to see me and let me tell you, to have a bloggy friend face to face is pretty exciting. Here is the pix of Carol and I.
Now if I can just visit face to face with my many other cherished bloggy friends.

Monday, May 02, 2011

BBTB2/Preserves/Apple

Our talented and loved BBTB2 leader, Heather, is our week's hostess. She asked us to design from the Preserves cartridge and to use the apple core die cut. I do not have that cartridge so I went to my much loved Doodlecharms cartridge and cut the apple. I love this cartridge...it has everything.
Here is my card.

I cut a Nestie opening in the front of the base card and placed the apple mid-center. I found some cute red with white polka dot paper, cut the sentiment from Blackletter and created the card.
We love it when you join in our challenges. We can use any apple so find a cartridge, make a card and do enter our challenge. Please be sure to mention that you are joining in on the BBTB2 challenge. Thanks for stopping by.
Recipe:
Cricut: Doodlecharms, Blackletter
Nestie (card front opening)
Doodling
Rubber Stamp

Monday, April 25, 2011

BBTB2/HomeDecor/Crown

Our talented BBTB2 hostess this week is Julie. She asked us to design from Home Decor and to use the crown. I hate to admit this but I put this card together in about 2 minutes using papers and sentiments that were laying in one of my well-known box lids. The Crown die cut was also in the box lid and I cannot find which cartridge I cut from. For 2 weeks now I have been once again on a tangent to get those lids cleared out and so far I've made about 120 simple cards. The paper is from a doggy themed pack and the cute dog with the alert little ears is an image I cut out from another part of the paper. The sentiment is from Paper Pups. I've pop dotted the doggy house, the cute little dog and the crown...and of course I added some bling to the crown and the collar. Hope you've taken a glance at the BBTB2 blog to see the design team contributions to our challenge and I hope that you will do up a card and post it on our blog to share. Please mention that you are sharing the card for the BBTB2 challenge.


Thanks for looking, thanks for stopping by and if you've left a sweet comment, many many thanks. I appreciate you.

Saturday, April 23, 2011

Box Lid Frenzy

Ah, the famous stack of box lids containing paper parts, die cuts, sentiments and "stuff".... Now and then I attack those lids and start putting together simple cards. I tell myself when I have extra things to take the time and make a card right then instead of tossing the spare parts in those lids. But soon the lids are full again and here is my latest "attack". If I find 4 die cuts I make 4 cards with that die, and you will see that in some instances I found 10 or so stamped sentiments and those became cards. Basically I pull out a die cut, grab some papers, a sentiment and the card is formed just using stuff laying around. It's fun and I accomplish a lot in a short time.


Wednesday, April 20, 2011

Cutting Cafe/You Color My World Cafe Set


Regina has a new set out that is wild and colorful.... I had about 1000 ideas on what to do with the colored "patches" and I finally settled on a gate fold card with 2 stacks that has a square scallop of the printable on top of a light pink, a lavendar and a fushia block . I placed two lightweight lavendar ribbons under the mounted blocks and that allows me to tie the card together. There are so many darling little sentiments in this set but I chose "I am wild about you".... it fits the wild and wonderful patterns. TFL and take a look at this darling set here.

Monday, April 18, 2011

BBTB2/Pineapple

Karen is out hostess for our BBTB2 week's challenge. She asked us to design from Wall Decor and to use the pineapple cut....however, if we did not have Wall Decor we could use a pineapple cut from any other cart. We hope that you will join in on our challenge too. Here is my card.

I used Life's A Beach cartridge. I cut the pineapple, the hibiscus flowers and the word Aloha all from this fun fun cartridge.
Thanks so much for stopping by. Please visit BBTB2 here and see the delights the girls have created.
I cut everything at least twice, ...and each of the flowers and the title have been popdotted.
Recipe: Cricut: Life's A Beach (flowers, sentiment, pineapple)
Background Paper: Polka Dots. The entire card is a folded pattern paper in a 5x7 size.
Jewels
Embossing

Sunday, April 17, 2011

Blue ribbon Green Frog

Frogs Are Green
I have been doing some sort of craft since I was about 14....(and when you do the math, that is about 50 years of crafting something) and in all that time it simply never occurred to me to enter anything in the AZ State Fair or the Maricopa County Fair. My high school friend Bonnie enters quilts and sewing creations and wins blue ribbons. She urged me to enter something... ...anything....a quilt, a card, something, just enter. I decided I would toss in the pink n' green froggy embroidery quilt. We took down our entries and I left with the over all feeling of being glad at least I entered, and I certainly had no expectations of winning anything.... it was just fun to put something in the fair under the category of "Quilt, Machine Embroidery"... This quilt has about 15 embroidery panels of frolicking froggies. On Wednesday April 13, we trekked to the fair since it was freebie day for us senior citizens. Bonnie headed for her vintage dress display and I headed for the quilt display. I cannot even begin to tell you how surprised and pleased I was to find my Quilt was marked "First Place" and I had a wonderful Blue ribbon tacked to it. Here I am....in all my frog quilt glory, doing some showing off. My wise Daddy used to tell me "you can't win if you don't try"... I hope my high school friend Dee was looking down from her heavenly seat because I know she would be proud of me. Dee was co owner of Quilt Camp,a Master Quilter was she, and after I had finished the Frog Quilt, I showed it to her and I said "You know, I am NOT a quilter, I just sew and this happens to be in the shape of a quilt".... "Hmmmm", she said, "looks like a quilt to me" and that comment was worth a gazillion rounds of applauding fans. My friend Dee lost a battle to cancer a year ago this March and the Quilting community lost a teacher and a friend.

Monday, April 11, 2011

BBTB2/Easter 2010/Egg

Our beautiful talented DT sister, Krista, is our hostess this week. She asked us to design with the easter egg on the Easter 2010 Solutions cart and if we didn't have that cartridge, any egg will do.. So, if you want to join in on our challenge, pick an egg, create a card and upload to our blog through Mr. Linky and please be sure to mention that you are indeed submitting for the BBTB2 challenge. Thanks to each of you who visits me, and I love your comments.
I happen to have the Easter 2010 Solution cartridge and I really love this little offering of many cute and beautiful Easter cuts. I cut a bunny and that was a hard decision to begin with because there are several and all are cute cuts. There are two egg choices and I opted for the scrolled egg. I cut two, with opposing papers of pink and white. They have been embossed as well as the bunny.... The pink and brown (a fave color combo of mine) background paper is a 12x12 design paper and I cut it so I would end up with a card large enough to accommodate the larger die cuts and all the "stuff" I wanted to add to the card. I found a left over pink and cream polka dot paper so I added that to the base. I love my little rubber stamp for the sentiment and that is placed on a Nestie cut that has been embossed. And of course, I added a big pink ribbon rose and two smaller ones.


A close up of those pink ribbon roses. I love these....
Recipe: Cricut: Easter 2010/Rabbit/Eggs
Ribbon roses, embossing, rubber stamp, pattern paper.

Saturday, April 09, 2011

Cutting Cafe Mikala

Everyday Mikala
Here is a card featuring a darling little printable gal called Everyday Mikala from Cutting Cafe. Regina has 3 of these cuties available. There is a dress set with cute pockets and all three little darlings are precious. I have to admit, my coloring skills are blah because my hands are really starting to act up with the arthritis but I gave it the ole' college try. Please pop over to Cutting Cafe and take a look at this set. I know that you will love everything from Cutting Cafe so wander around and see the delights that Regina offers.

Monday, April 04, 2011

BBTB2/Mother

Happy Monday.... our talented BBTB2 Design Team Sister , Lori, has asked us to design with the seasonal cartridge for Mother's Day 2010, and if we do not have that cartridge, we can use anything that says Mother, Mom, Grandma, Happy Mother's Day..... Weld letters together if you will. Why don't you join in on our challenge? We love to see your creations. Here is my take on our challenge.

I mixed a few papers together for this recipe...starting with a pink and yellow polka dot for the background, a pale yellow embossed mount upon a EK Success lattice work punch. Upon that I placed a small punch out strip of light turquoise. I had a circle scallop just laying about so I placed a pink and yellow bow upon that and then I added some of those fun fun rolled up roses in paper. The leaves were fussy cut, and the title is from Beyond Birthdays.


Here is a side view of the roses. I always feel this is the kind of card you hand to someone instead of trying to mail it...unless, of course, you are adding a gift and then the dimensional card can be placed in a nice roomy gift box. Have you made some of these flowers?.... they are so easy and there are several ways. I fussy cut with scallop scissors or even punch a scalloped circle. The smaller the circle, the smaller the flower. Once the circle is cut, take a little nip at the side and begin to cut around so that essentially you have a spiral... which eventually leaves a small round area at the very end. At the beginning start to roll the paper "strip" and a flower begins to appear. Once it is all rolled I put a small dot of glue to hold the shape and then I glue the rolled flower to the round base. If you want a flower without the scalloped edges, just cut with straight edge scissors. For larger flowers, it is fun to roll them tight, let it loose to unroll and then reshape gently. You are left with a lovely flower. Add a center of your liking and you have a wonderful dimensional embellishment. My flower center was done with a very small circle in pink paper.
TFL.... and if you leave me a sweet comment, I will appreciate it. I hope you have enjoyed looking at the design team sister's creations at BBTB2.

Monday, March 28, 2011

BBTB2/Disney/Dreams Come True

Random Draw Winner: I am pleased to announce the winner for the Duckie Quiltie. Congrats to Sharon who said she will give the quiltie to her granddaughters for her dolls. Sharon, please email me quickly so I will send the Quiltie to you. Thanks to everyone who joined in on our blog hop.
DISNEY DELIGHTS
Happy Monday and a very Happy Blog Hop to one and all who visits here. I love being part of the talented design team for Bitten By The Bug2 and I especially love month end when the blog hop event comes to the board.

Our talented design team sister, Maria, is our hostess. She wanted to showcase some of the newest Disney cartridges but if we did not have the newer ones, we could design with anything Disney. H0pefully you have started out with the BBTB2 blog and then came to visit me from Maria's wonderful blog here. I grabbed up my Dreams Come True cart. It was a cartridge that was given to me by my friend Cathy and I am ashamed to admit, I just had not used anything from it. Once in the manual I found I loved the little fishie Finder, oh and the mermaid Ariel caught my eye but finally I settled upon this wonderful corner border on Page 41. I cut 4 base borders and popdotted the top design. I also popdotted the pretty little flowers the scatter around. Behind the border design I added the sea flora that I saw on the fishie page. I embossed the base card with the swirls, and then connected some of my lovely punch out letters to make the word LOVE. Each letter was embossed as well and just cuz, I added a little heart on the L.

This is a side view of the card to show the popdotted sections of the design.
Recipe: Cricut: Dreams Come True (Border)
Cuttlebug Embossing folders: Swirls/Swiss Dots
Jewels

Now onto the fun fun part of our blog hop. The blog candy!... This BH I am offering up a small 27x20-1/2 quiltie. I have tubs of fabrics and when I was rummaging around in one of the tubs, I came across this sweet duckie print. There was just enough to make this cute little quiltie ...it might be cute to use for a doll or a teddy bear... It might be a little coverlet to sit upon for a tea party. Perhaps it can be a cute gift to someone. I have used the tied method on the quiltie which results in a puffy finish, and the binding was done with a red and white heart fabric. If you wish to be included in the drawing for the Duckie Quiltie please tell me that you have a child who will use the quiltie for a doll, tea party or playtime, or if you will give the quiltie as a gift to a child you know. I will put your name in the draw on April 1. Check back after 2:00 that day and if you are the winner, please email me quickly so I can make arrangements to mail the quiltie to you. If I do not hear from the winner by April 4, I will select another name in the draw.
Here is a close up of part of the duckie print. Bright n' colorful it is....
Now...for the rest of our blog hop fun, I am so pleased to direct you to our very talented designer sis, Donna. She will delight you with her imagination of designs, and I am always envious of her many layers and details.
As always, thanks for visiting.

Monday, March 21, 2011

BBTB 2/Paisley/Dachshund Dog

Monday is Dawg Daze
Happy Monday...it's time for the BBTB2 design team to present their take on our oh so talented design team sister Melissa's selection for our challenge. She asked us to design from the Paisley cartridge and to use the darling little dachshund dog on Page 33. I know you will love what the designer's have created. Here is my take on this challenge.
This paper pack is so so cute....my dear friend Judi gave me the pack which is filled with darling little doggy patterns. Her 2 little dachshunds are always busy guarding their yard from lizards so when I saw this little "all in a day's work" theme, I just had to use it for the dachshund challenge.
Here is a side view because I popdotted the dog and the bowl of doggy food that is part of the paper. I did a fussy cut for the bowl.
Recipe: Cricut: Paisley (dachshund)
Paper: Pressed Petals "It's A Dog's Day" paper pack
Popdots, button, flower punch, distressing.
Thanks for taking a look and I hope you have been to BBTB2 to take a glance at the wonderful cards from each of our designers. Also, we would love to have you join in on our challenge but uploading a doggy card from any cart through the Mr. Linky on the BBTB2 blog.

Friday, March 18, 2011

Sewing Frenzy

I take turns making cards, scrapbooking and sewing... Everything is always set up and ready to sit down and take off so that makes life easier for this blessed retired crafter/cardmaker/quilter/scrapbooker kinda gal.

I have tubs of fabric...small pieces that I couldn't bear to toss so those always become scrap totes or quilts or projects... I have a lot of fun too picking up a new fat quarter and creating something. Here are some quick n' easy totes I've made recently.


Quilts are fun and although I am quick to say I am NOT a quilter, I sew these creations together with great delight, using up pieces of left over fabrics, adding new fabrics, embroidery designs, and some rick rack, buttons and embellishments on some. The yellow quiltie (I don't make big quilts, I get bored too fast) is a cute little embroidery designed quilt with fanciful cats and dogs here and there.
The two small quilts on the left are truly scrap quilts. The one on the right was a charm quilt ...so easy to sew the squares together and voila'...a quiltie. I had this one professional quilted on a long arm.
This is a scrap tote and I made this for my design team sister, Theresa Kelly, who likes froggies like I do. I had just this small strip of brightly colored fabric that had lazy frogs floating around on lilypads. I saw that on this strip there also were some cute little dragonflies and I was delighted to find more scrap fabrics covered with dragonflies. I sent it to Theresa and she loves it.
This scrap-tote is created from some of the tiniest pieces of fabrics I had laying around. Bright, isn't it?...this became a birthday gift for my friend Juanita.
One of my faves.... this cute little embroidery cat was sewn into a small table runner...and it was made especially for my design team sister, Donna, who has two of the cutest cats evahhhhhh.
That's just a sprinkling of the creations laying around. I am having fun and like I told my quilter friend Bonnie..."keep the quilt police outta here"....

Monday, March 14, 2011

BBTB2/Easter/Chick

Happy Monday and it's BBTB2 challenge week with Penny Shuberg as our talented hostess. She asked us to design from the Easter Solution cartridge and to use that darling little chick as our main design. I LOVE this cartridge...it has wonderful Easter Eggs, all scrolled and layer. And that darling little chick is just ....well......chicka-precious! I did Gate Fold Card design. Normally the gate cards open and stand, however this style opens from the top. Gate Fold cards don't usually fold flat so I made a little tab just under the overlay of Happy Easter, and the tab slips under the popdotted Easter Egg on the lower flap.
The top flap has the Happy Easter sentiment from the Easter Solutions card and that was mounted on an embossed white cardstock shaped with my Nestie, and that was mounted on a larger Nestie with the green checkered paper. I added a lime green ribbon just above the layer.
The bottom layer has two chickens and an easter egg.... mounted on a strip with green checkered paper and the same lime green ribbon.

Here is a side view of the Gate Fold design.
Recipe: Cricut: Easter Solutions (Sentiment, Chicks, Easter Egg)
Cuttlebug Embossing Folders
Green Ribbon
Checkered Pattern Papers.
White cardstock base in Gate Style ... (6x11, scored at 2-3/4 at each end.)
Thanks for stopping by and if you have left a sweet comment, I thank you. I always appreciate your visits. I hope you came to my blog from the BBTB2 blogsite and enjoyed looking at the wonderful design team offerings.

Monday, March 07, 2011

BBTB2/Ladybug/BoysWillBeBoys

Happy Monday.... Heather, our wonderful leader in all things BBTB2, is the hostess for our week's challenge and she selected Boys Will Be Boys cartridge. We are to design with the ladybug. I do not have that cartridge so I went to my trusty and oh so versatile Doodlecharms cartridge to use that cute ladybug. Be sure to see all of the cards by the designers at BBTB2.

I decided to use the Easel card design. Usually the easel card is cut at 10x4-1/2 inches but because I had some rather busy scenes to design, I cut the base card at 10x5-1/2. In usual design style, I scored at 2-1/2 and 5 inches in, and the first fold is folded down to accommodate the outside card. This photo displays the card in the easel style. The Mushroom on the bottom half of the card has been popdotted with double layers so it will stand nice and high.

This is the front of the card when laying flat.
I love how an easel card stands. I often find that recipients of my easel cards do not know how to display my "art" so I will enclose a little direction sheet.
Recipe:
Cricut: Doodlecharms - Ladybug
Simply Charmed - Mushrooms
Paisley - Sweet
Flower: Creative Memories flower punch
Cuttlebug: Embossing
Thanks so much for stopping by to visit and I always appreciate it when you leave a little comment that tells me you were here.