Monday, April 30, 2012

BBTB2/Ice Cream Cone

Our hostess this week is talented Penny who asked us to design with an ice cream cone.  We can use any cartridge that has this cut.  Here is my take on the challenge.  I can always use a birthday card and what better way to celebrate one's birthday than to have a yummy pink polk dotted ice cream cone?
I cut my ice cream cone from my CHARMED cartridge... the background is a Cutting Cafe printable, and  that is set upon some EK Success punched edging.  I added some pink and white polka dotted ribbon and a sweet little pink rose.   The inside says "Have a sweet birthday"....

We'd love for you to join us in our ice cream cone challenge.  Just make a new card using the selected die cut from any Cricut cartridge, link your card up to our Mr. Linky with a link back to the card on your blog.  Be sure to mention you've joined our challenge and don't forget, make sure you have disabled that word verification so we can leave a sweet comment.  I can't read those difficult words so I can't leave a comment, and our very own BBTB2 blog asks you to please disable the WV.  Remember, as a blog admin of your own blog, you cannot see that WV is enabled but we can if we visit.  If you need help to disable it, and would like to enable Moderator comments, that will allow you to have control over all published comments, please contact Donna or I and we will be glad to tell you how.

Thursday, April 26, 2012

Nifty Fifties, Class of 1955

I am the Class of 1955 from West Phoenix High School, Phoenix, AZ.  The school name is gone, it has become a Tech school teaching wonderful careers to young people.  They have an awesome dining room with students learning the trade and we often have class reunions in the dining room.  Last Friday our class of 1955 celebrated our 57th class reunion. It was a big blast of a birthday party where most of the class will turn 75 in 2012.  We thought it was a sweet little twist to see 57th year of graduation, and flipped that becomes ....75...
Here is a giant poster I made using the Cricut cartridge "Nifty Fifties".  We were very blessed to be teenies in the fifties, doncha think?...


Monday, April 23, 2012

BBTB2/LadyBug

Happy Monday, dear visitors.  This week our talented hostess is our darling Krista who asked the design team to create using a ladybug or a bee...your choice, and you can use any cartridge that has those die cuts available.  My ladybug is cut from Doodlecharms. My card is a gate fold.  The base of each side of the fold has a pretty red pattern paper, then I mounted an embossed Nestie shape.  On the left side is the sweet little ladybug with googly eyes and some sparkly dots .  The sentiment is a Cutting Cafe sentiment.  On the right side of the card, I have added two flowers that were cut from George & Basic Shapes in several layers.  The inside of the card says "Happy Birthday Ladybug".  

We would love to have you join our challenge.  Just make a new card using a Cricut cartridge with a ladybug or a bee, upload the card and direct the link back to your blog with the selected card, give us a shout out that you have joined our challenge, and please please disable that awful word verification.  Our challenge rules have added the request to disable the WV.  I simply cannot read the difficult words and the end result is I visit the blog, attempt to leave a thank you comment, and then I leave disappointed because I've encountered the word verification.  I will email anyone with WV to let them know I've attempted to leave a sweet comment and I ask them to disable the WV.  Once I know that has been done, I happily bounce back to their blog to say hello and thank them for joining in.  If you need help in getting that disabled, Donna and I will be glad to guide you to the right spot on blogger to do rid your blog of the word verification. 

Monday, April 16, 2012

BBTB2/Balloons

Happy Monday....Happy April. Here in AZ it is the month we wait for. A month to bring forth a short springtime that seems to scurry away before we can enjoy it. The flowers are blooming, the birds are alive with their happy songs....and it is a time when I can open up all of my doors and bring in fresh air and see the world about me. My darling cat Riley loves it too because he can rush from front door to back door, keeping guard and making sure those two porch cats, Sweetie Pie and Meow Meow, have not gained entrance to his inside kingdom. And when he tires of all that rushing back and forth, he simply lays in the center of the room so he can keep watch over both areas. I love this cat....!

It is also Birthday Month for our talented sister, Jeri, who asked us to design with balloons for our weekly challenge. All four of her daughters were born in April so she has reason for such a wonderful celebration. I used the balloons on my Celebrations cartridge but if you wish to join up with our challenge, you can pick a balloon from any cartridge. The rules are: make a new card that must use the selected cut from a Cricut cartridge, upload it to our Mr. Linky, mention on your blog that you have joined in our challenge, state which cartridge you used and a link back to BBTB2. And to be really kind, I hope you have disabled that awful word verification.

My card is a gate fold design, the bejeweled "wish" and word "birthday" overlap to the right side. Inside it just simply says "My wish for you is to have the best birthday". The jeweled sentiment was from the dollar bin at Michaels, and the printed sentiment is from Cutting Cafe printables "Happy Birthday 40 Ways" set and you can view that wonderful series right here:

Hope you join us on our challenge. Thanks for visiting me, and if you leave a sweet comment, I will so appreciate it.

Monday, April 09, 2012

BBTB2 Design Team Call

Hello everyone.... we are taking a bit of a break this week on our challenges but we will be back on April 16th with a neat challenge. Meantime, please take a peek at the BBTB2 blog because we have announced a design team call. As you know BBTB2 is a Cricut based design team and we are looking for a few more design team members to add to the inspiration of a creating cards with Cricut cuts. Please see what we are asking of you as a design team sister and follow the instructions if you wish to apply for our team. We cannot wait to see what you create.

Thursday, April 05, 2012

Family and Friends

In March I hosted a Celebration of Life luncheon with family and friends to remember my Uncle Jack who died December 6th. He was much loved, and his passing has left a void in so many lives. Here is our wonderful group... We had a lovely meal, I shared some fun memories and I introduced each family to the group even though most of us were connected through my Uncle. He was cherished. I miss him. That me in blue ..in front row, far left , and my darling daughter in law sits to my right. My son is in the back row, third one from the right.

Monday, April 02, 2012

BBTB2/Princess (the Word)

Happy Monday... I am so glad you are visiting me to see the Monday card challenge for the BITTEN BY THE BUG2 design team. Mona, our sweet DT sister, is the hostess and she asked us to design with the word "princess". You may use this word from any cartridge. I do not have a cartridge that had the welded word so I opted to use Blackletter and to cut each letter individually.

Let me admit. I almost opted out of this challenge. I have not had as difficult a time in creating a card in a long time and this one did me in. Four times!.... I made 4 other cards and they were so NOT, I tossed them. This card is the 5th attempt and I have to admit, I don't like it. But I never ever want to miss a challenge so here I am with what could be called a birthday card for a little girl. And as is so typical when things aren't going smoothly, after I photographed the card for upload, after I transferred the photos to my computer and I reviewed them, I discovered two of the little pearls had fallen off. Back to the studio, add the pearls, back to the patio to photograph again... sigh.... Last year in Michaels I was wandering around their dollar bins and I found the jewel butterflies and I bought several packages. I was cleaning the little bins and cups of whatnots yesterday and I found them. I decided to further annoy this card and I would add two. There are mini pearls as well...on the crown and on the lifted sentiment. Everything is embossed as it my usual style.

Please join in... create a new card using the word Princess from any Cricut cartridge, upload that card to Mr. Linky on our BBTB2 design team blog, be sure to mention on your blog you have participated and name the cartridge you used...and please make sure you have disabled that horrid word verification. I cannot read the letters and if I visit your blog to say thank you and comment on your card entry, and the WV pops up, I can leave no comment. I know you've visited BBTB2 to enjoy all of the wonderful creations from my design team sisters.

Monday, March 26, 2012

BBTB2/Flourish

Welcome to my presentation of our BBTB2 weekly challenge. Our hostess, Julie H from across the pond, has asked us to design with flourishes from Cindy Loo. If you don't have Cindy Loo, that's okay, ...just design a card using any Cricut cartridge flourish. Join us by uploading your new card with Mr. Linky, link it to your blog with the card for this challenge, give BBTB2 a shout out that you have joined in the fun, and tell us the cartridge you used. If you haven't done so, please turn the word verification off so we can leave comments easily.


I used my newest Cuttlebug embossing folder on my blue base card... Oh my, I love this beautiful embossing. The flourish is from Cindy Loo. I cut the shadow in white while the flourish is in a beautiful rich brown cardstock. I added a few little blue ribbons and those pretty pink flowers are the Spellbinder's Flower. I added a pretty gold jewel for the center, and the flower layers have been embossed as well.

Thanks for visiting me... I hope that you have come my way from BBTB2 and I know you enjoyed seeing the wonderful cards and projects from our design team. Have a wonderful week, my friends.

Monday, March 19, 2012

BBTB2 - Welcome

Happy Monday.... the BBTB2 design team is presenting their projects for Theresa's hostess choice to use the word WELCOME.... from any cartridge. I used the wonderful My Cricut Search.com to find the cartridges that had the word Welcome. And believe me, there are a LOT of choices. I selected Simply Charmed and New Arrival for my project. Welcome Little One is Simply Charmed while the cute little girl baby die cuts are from New Arrival. I embossed everything, added a lot of scalloped edge punching and embossing. This little hanging sign would be cute on a wall, a crib, a doorknob.
Join up with BBTB2 with your take on our challenge. Upload your card through Mr. Linky, link back to your blog for the specific card, mention the Cricut cartridge you have used to make the selected cut (Welcome) and be sure to mention that you are joining our challenge. Hopefully all of our wonderful BBTB2 friends and visitors have removed that hard to read word verification so we can leave you a sweet comment and thank you for joining us.

Monday, March 12, 2012

BBTB2/Easter Stuff

Happy Monday.... this week's challenge at BBTB2 is from hostess Julia Moss who has asked us to design using a chick or a bunny to celebrate Easter. We can use any cartridge, any chickie, any bunny. I picked up my wonderful EASTER 2010 cartridge. I actually had a folded pattern card base and I just sort of plopped a few scalloped edges in the center, added a MS weave punch and then added those cute cute chicks and bunnies. Of course they were embossed.... The sentiment is one of my favorite rubber stamps. Mama Bunny has a sweet blue ribbon around her neck.
Please join us on our bunny or chick challenge this week. Load up your card from your blog to Mr. Linky, be sure to give us a shout out that you have joined the challenge, and please please please do us a favor and disable that awful word verification that has slammed so many blogs. I can't read those wavy blurred words and that prevents me from leaving a sweet comment to the participants. One thing I might mention: as a blog administrator (you and me) we are not able to see that the word verif is enabled. You have to enter your "settings" and find the option there. If you would like to have control over postings, enable the Moderator Comments which allows for you to preview all comments before you allow publishing....Have a wonderful week.

Monday, March 05, 2012

BBTB2 - Shamrock

Welcome to my take on the weekly challenge at Bitten By The Bug2. Our hostess is Lori and she asked us to design with a Shamrock. My Shamrock was cut from Give A Hoot cartridge (love this cart)... and I admit... I had a hard time getting something completed that I liked.
I think I made about 4 cards before I just decided to go with a door hanger. The shamrock has been embossed and has some pretty green jewels to add a wee bit of blarney bling. The title is actually a pretty turquoise cardstock and no matter how many photos I took of the project, the title came out blue. I added some pretty little MS flowers with a yellow center jewel.
Be sure to join us for the Shamrock challenge. Link up your card or project through Mr. Linky, link back to your blog for the specific card, and be certain to mention you are participating in the BBTB2 challenge. Thanks for visiting...

Saturday, March 03, 2012

Card Camp Adventures

Oh what a wonderful morning.
Oh what a wonderful day.
We had a lovely weekend
With all that came to stay.
Kris Lancaster, Deb Emrick and Pat Korver joined me on the weekend of February 24 to do our annual 2-1/2 day Card Camp. This was Pat's first time joining in, and she was here early, so excited to be included in this creative gathering. I told her "when those girls pull in, you stand back because it will be an assembly line of taking supplies from the car to the living room and before you can sneeze, it will be all set up and ready to create. This is our 4th year so the process if pretty well under control.

Pat is standing, Kris is the blondie and Deb is the brunette...and these gals are oh so talented. Pat makes absolutely the most wonderful cards with details down to the tiniest degree, Kris is the most talented Prisma pencil gal I've seen and Deb plans her cards out with wonderful auditions that bring forth a perfectly planned card design. During our Card Camp, I usually mention that I've slammed together about 75-90 cards because I spent a week or so getting the cardstocks folded, pattern papers selected and cut, and embellishments and sentiments all ready to apply. However this year I had a special project of making some Memory Albums to hand out to my family and friends who will attend a Celebration of Life luncheon I am hosting to remember my Uncle Jack who passed away. The girls saw me go into a pretty good stressful Friday but on Saturday I calmed myself and managed to complete the albums. I had planned a certain format for the albums and then changed my mind. I had everything all together so I could sit down and pull all of the elements together. But there I sat, midstream on one plan, my mind formulating a different design and I just sat and stressed because I couldn't find my starting point. That doesn't usually happen to me, but these albums are oh so important and I wanted every detail to be the best it could.

The little fold over 24 page slip in pockets of the album was just perfect for adding photographs of my Uncle as well as a photo of each and every person who will be at the luncheon. I added some personal memory statements. When I finished adding the contents, the flap would not lay flat. It has a magnetized flap but because of the contents, it could not connect. Another stress arose... and then I had a most wonderful epiphany. I remembered a tub of wide ribbons that my Uncle had given me years back to use... they were from the 50s, in browns and grays and blacks. A perfect perfect ribbon to tie the little albums together. The front of each album has his initials and I've added a little tag with the name of each recipient. I know that my Uncle Jack would be very happy with my efforts to remember him with family and friends.


Thanks for visiting me...


Monday, February 27, 2012

BBTB2 Monogram

Our leader and ultra talented Donna is the hostess this week...and she asked the design team to create with monograms. Any cartridge, any lettering.... Anytime the subject arises for a letter, I head right to my Cindy Loo cartridge. I think the letterings on that cartridge are simply the best and I love the selections.

The coral card set was made for a sweet gal named Tia at my bank who took a few hours to correct some important paperwork ... I embossed the card base, used an MS weave punch, embossed the white mount and added her initial. The second card with the initial J is a birthday card.
Please visit our blog at BBTB2, enjoy the wonderful talented design team cards and projects and be sure to join in on our monogram challenge by uplinking your blog and specific card thru Mr. Linky and be sure to mention BBTB2 in your blog post. Remember...it's important that you have that awful word verification disabled so your visitors can leave a sweet comment. You can read the request in the challenge rules on the blog here.

Sunday, February 26, 2012

Riley Cat

I hosted the Card Camp this weekend and Riley had great fun moving from spot to spot, leaping upon work spaces to snoop and he became used to "NOOOO Riley, NOOOO". Last night he hopped into MY recliner and this is the look on his face as if to say "MOVE AGAIN????"


Monday, February 20, 2012

BBTB2/Nate'sABC's/Garden Boots

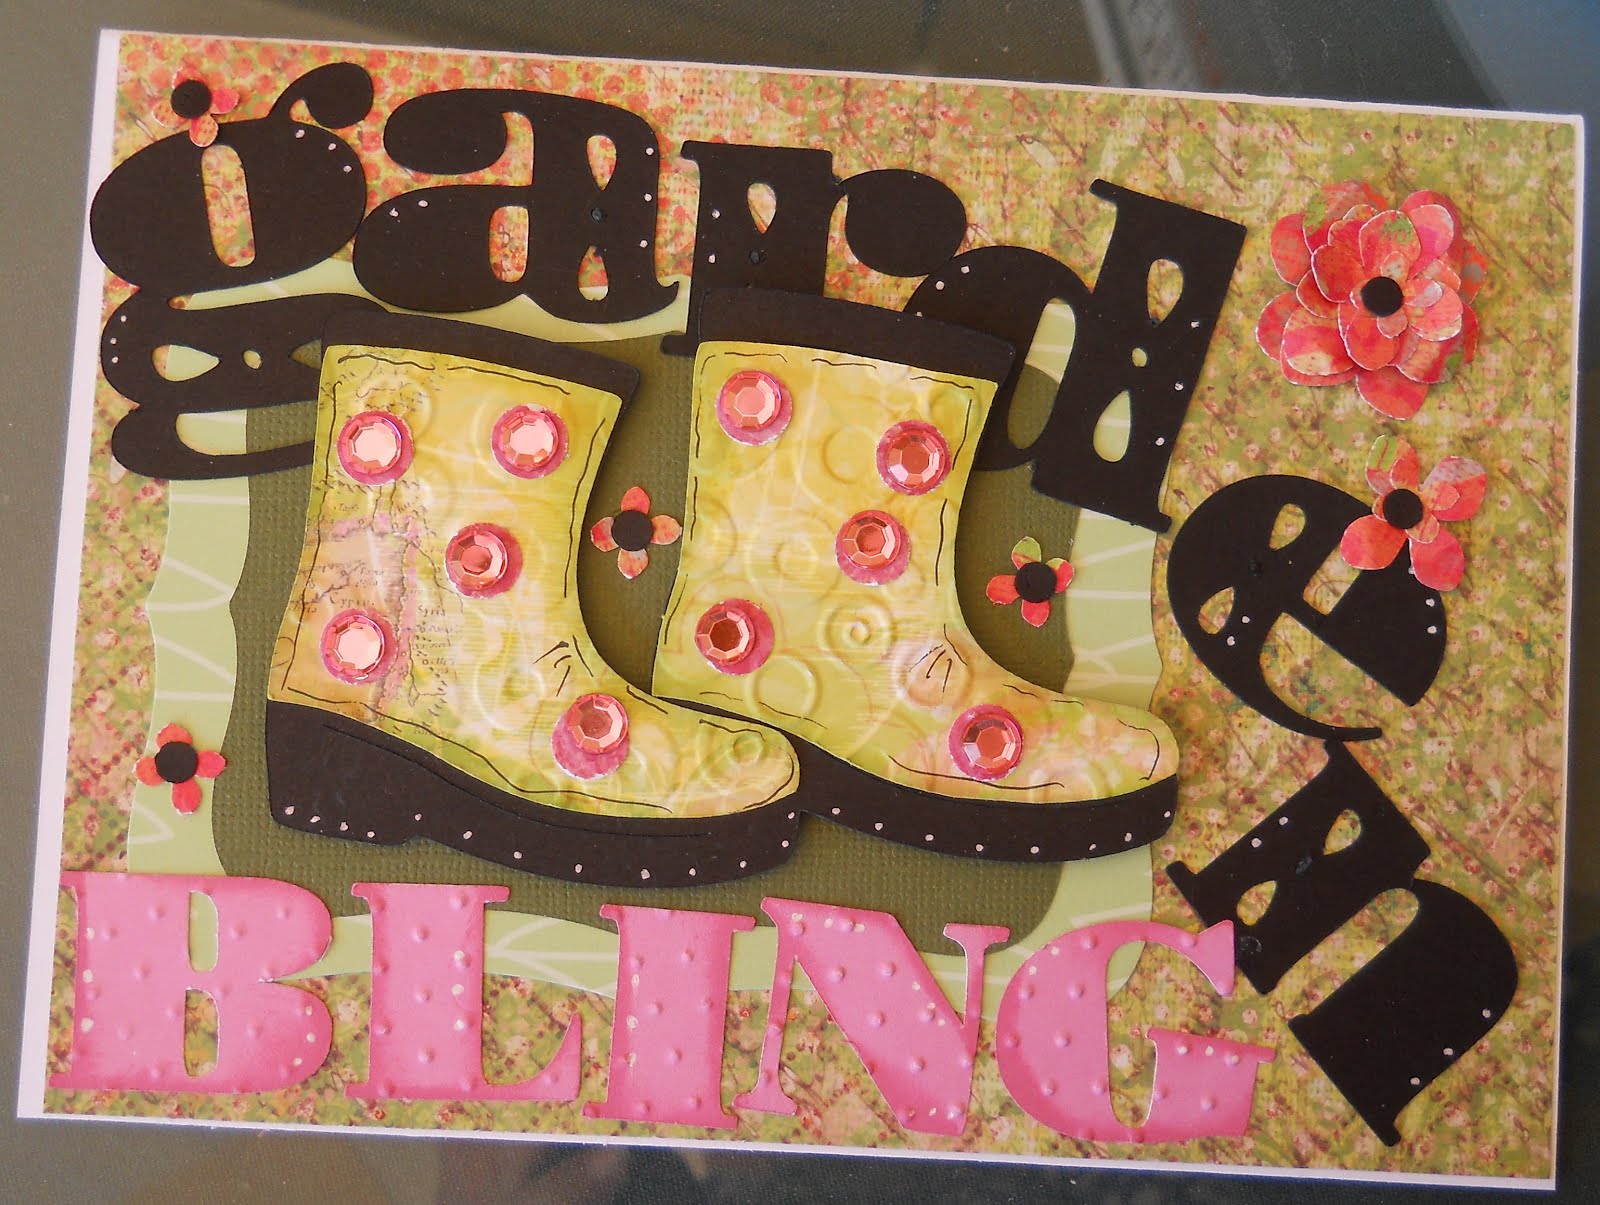
SPRING BLING

Spring is almost here and I know we are anxiously awaiting green grasses, the blooms on flowers, bees buzzing around the sweet scents of spring, birds chirping....and weather that is pleasing.

I am the hostess this week for the BBTB2 challenge. I asked the design team to use Nate's ABC's and to design a card or project with the garden boot cut. There are boots on other cartridges ..Create a Critter, Everyday Paper Dolls, Freshly Picked. There are other boots that can be decorated with a garden theme. Please join in on our challenge. Upload your project to Mr. Linky, link back to your challenge card on your blog and give us a shout out. Make your project a new project to meet our challenge selection.

I want to comment on a problem I am encountering. As a design team member of BBTB2 I love to leave comments to those visitors who upload their card to our weekly challenges. Recently I am finding a topsy turvy very blurred word verification that must be entered in order to have my comment published. I have tried many times on several blogs but I simply cannot read that blurred lettering and I end up leaving the blog without a comment. That makes me sad because I want our BBTB2 visitors to know that I appreciate their participation.Blogger announced later last year that word verifs are not necessary and to quote a friend "be a friend to your visitors...delete your word verifs". I just want to explain why I am not leaving comments on some of the blogs.

I had some pattern papers laying around that I used because of the garden colors. The green of the grasses, pinks of the flowers. First, I embossed the boot cuts, then I added some pink jewels ... hence the title of Garden Bling. I am not much of a gardener anymore because of aged joints, but at one time I had a splendid garden full of vegetables and flowers. The little flowers added are a MS punch. The title of Garden Bling is cut from my favorite lettering cartridge....Cindy Loo.


Thanks for visiting, my friends. I always love your comments... be sure to visit BBTB2 and delight in the design team projects.

Monday, February 13, 2012

BBTB2/Love Struck/Couples Heart

Happy Monday everyone.... Our BBTB2 hostess this week is the lovely Susan who asked us to design from Lovestruck cartridge and to use the couple's hearts. I do not have that cartridge, so I went to my first cartridge ever owned and created my design. George and Basic Shapes has the wonderful heart shape I need for this design. This is a hanging tag. The base of the tag is the letter O five inches in diameter... I cut 6 hearts 2 inches in size, and each was embossed with a different embossing folder from Cuttlebug. I glued the hearts side by side and then I punched two holes on the side of each heart, strung a ribbon through and tied a bow. I added a small fuchia punch heart, and a red jewel. The word "love" is cut from Beyond Birthdays cartridge. I had a dimensional flower laying around and I just decided this little flower would take away that blast of red hearts.
Here is a little bigger view of the tag which measures, in total, 5-1/2x5-1/2.
Please do enter our weekly challenge using a heart design. You do not have to have the selected cartridge, just make sure you follow the entry rules posted at the top of the BBTB2 blog. Make a new project, link your card and blog to Mr. Linky, and be certain to give BBTB2 a shout out.
Have a wonderful spiffy week.

Sunday, February 12, 2012

Valentine Gifties

Each year at Valentine's Day I take some gifties to my friends at my former office. They are my forever cherished ones. I saw the most awesome candy wrapper by my dear friend Sandi Kelly and try as I might, I could not duplicate the beautiful flower she created for her candy wrapper. I made 3 wrappers and just took on a simple Valentine design for each. I created the paper by typing sentiments in different fonts and I found that one sheet of 8-1/2x11 would create a cover for two candy bars. I added some MS punch edges, a few hearts, a ribbon and a jewel to each. I love the design and they will have to deal with all those lovely calories beneath the papers. The initials are from Cindy Loo.... this is one of my fave letterings.
This shows some of the candy bars, a small gift card folder that will accept a Starbucks gift card for my friend Gay. Each of my friends will get a ribbon string of hearts. I've tossed in 3 little bookmarks too.
This is Gay's birthday card. The hat (from Doodlecharms) and it sits above the card edge. I will have to get one of the larger envelopes to put the card in.
I can't wait until Tuesday to take my gifties into my friends.

Saturday, February 11, 2012

Just Ducky

I have been passing the time away playing in paper piles and I put together this little D is for Duck card. All designs are from Nate's ABC's. I added a lot of embossing and a little heart for fun.

Monday, February 06, 2012

BBTB2/SweetHeart/Tag

Shelly is our hostess this week at BBTB2 and she has asked us to design from Sweethearts cartridge and to use the heart tag. If you wish to join in our challenge, you can use any tag from any cartridge. Just follow our challenge instructions posted at the top of our BBTB2 blog.

I almost want to name this project my "junky tag" because it just sort of was slammed together ... I cut a bunch of hearts with a shadow in black, I had the word "love" in a box lid (spare parts, ya know) The tag, the hearts and the key all came from Sweetheart cartridge. I did lay a gold ink pad over the key cut, sprinkled gold embossing powder on it, then gave it a good heat up with my embossing gun. I added a red ribbon and some gold thread, everything is embossed. I had this little box of black and white and red buttons so I decided "why not" and glued some on the tag. See?....junky.
I hope that you enjoy visiting BBTB2, because we truly enjoy creating projects to inspire. Please do join in our challenge. We want to see what you did with a tag.

Monday, January 30, 2012

BBTB2/Baby Buggy

I am pleased to announce the winner of my blog candy draw (the little green tote). Congrats to Maureen. Please email me and I will get the necessary information to mail the tote. Thanks to everyone who visited and left a sweet comment.
Happy month end and happy blog hop to one and all. I cannot believe we have skipped right on through the month of January and now head for February 2012. Awesome time travel!!! I am pleased to tell you I am the hostess for the blog hop for BBTB2. I asked the gals to design with a baby carriage. I selected New Arrival but there are several baby buggies/carriages/prams on other cartridges. So if you would like to join up with our challenge, please do so. We are a Cricut Based design team so we ask that your design has at the selected cut from a Cricut cartridge and we ask that the project be a new design. Be sure to mention on your blog that you have joined in with the BBTB2 challenge. We love that shout out.

I hope that you have started your blog hop at the beginning with Heather right here.... from Donna's delights here you have been guided to my blog. Here is my card:

This is a side view so I can show the dimension for the carriage. Gotta love those popdots.


I cut several of the carriages from New Arrival in two different sizes. The base mount has been embossed with the BABY embossing folder from Cuttlebug. I used the smaller carriages for the background, the two different pattern papers were exchanged between the two smaller carriages that show, the larger carriage cut at 5-1/2 sits atop the base. I added a white ribbon for bling. The word "baby" was in a stash box so I am afraid I cannot tell you which cartridge it came from, but I do like the style of the word. Little punch hearts decorate the wheels, and the main carriage has been embossed.
If you leave a comment on my blog when you visit, you will be put into the draw for my blog candy. I make totes, by the dozens, to use up the drawers and tubs of stashed fabrics. This is just a smaller tote adorned with eyelet lace and some checkered ribbon. It is lined but has no inner pocket. I will do the draw on February 3 so check back after 2PM that day. If I do not hear from the named winner by February 5, I will redraw.
Now onto Krista's darling blog...where you will be delighted. Be sure to visit BBTB2 and follow along with the blog hop. Visit each designer on their blog because you will be in for a treat. Thanks for visiting.

Monday, January 23, 2012

BBTB2/Bloom

FLOWER POWER
Our talented and sweet hostess this week at BBTB2 is Jeri. She always has such great choices for us to design with and this week she asked us to design from the BLOOM cartridge and to use a 6 petal flower. As an additional bit of challenge, Jeri says we have to show a wee bit of dimension on the flower. . If you do not have that cartridge (I don't) you can use any 6 petal flower from any other cartridge. . I went to my Walk In My Garden cartridge. One of my faves. I think every Cricut cartridge is one of my faves. Please join in on our 6 petal flower challenge. Mention on your blog that you have entered the BBTB2 flower challenge, and make sure the upload is a new project. Here is my card:

This is a side view so you can see the layering of the flowers. I cut two for each flower, the base flower is flat on the card base but the second layer has been popdotted as well as the flower center. I added a bit of bling with the jewel centers. The ribbon came from a gift box and I just had to add it to the fray.

The leaves are a Martha punch. Everything has been embossed which seems to occur on every single card I make. The sentiment is from Cutting Cafe in the "You're In My Thoughts Greetings, Inside and Out". You can see that set right here.
Thanks so much for visiting and if you leave a sweet comment, you know I will appreciate it so much. Please consider entering our flower challenge. We'd love to see your creation.

Monday, January 16, 2012

BBTB2/Numbers

It's BBTB2 Monday Time.....Our talented leader Donna is the hostess for this week's challenge. She asked us to design with numbers...from any cartridge.

I had instant ideas on this challenge and I landed on the number 75. I am close friends with so many of my high school friends, we have reunion luncheons twice a year. Next year we all turn 75 so I made a birthday card for a dear friend although the card will sit for at least a year since the birthday is in December.

I used the numbers from Cindy Loo.... this cartridge has some mighty fine cuts but I absolutely love the alphabet and number cuts. The little turquoise design in the center above the numbers is from Cindy Loo as well. I cut three and made a flower. The base of the card was made from Wordle. I used to design a lot of cards using Wordle and then I sort of forgot about it. I had to email my friend DeeDee Campbell so she could jog my memory and she knew right off what I was looking for. If you haven't used Wordle, give it a try at www.wordle.net. You can have a lot of fun with this program which is free. I use the Word Clouds part of the program. The corners of the turquoise matting was corner punched with one of my fave punches. I've embossed most of the design and in the lower left corner I placed a Shrink Art birthday message. I have a box of these little trinkets that I made up a few years back. It is so much fun using a rubber stamp on the shrink plastic, then I cut it down, punch a hole and when I place the shrink plastic in the toaster oven, it is absolutely like magic to watch the little square curl up, uncurl, shrink down, leaving a very crisp sentiment.
Thanks for visiting. We'd love it if you join in on our numbers challenge. Just be sure to give BBTB2 a shout out on your blog, and we ask that your card be new.

Monday, January 09, 2012

Caterpillar/WIMG

Happy Monday, dear ones. Today I host Bitten By The Bug2 weekly challenge. I selected the darling little caterpillar from Walk In My Garden cartridge. I hope that you will join in on our challenge and if you don't have WIMG, there are many cute little caterpillars on other cartridges. Just remember to mention that you have joined in the challenge at BBTB2 (so your visitors will know where to look) and make sure you have created something new for the challenge.

My card style is a Gate Fold Card, one of my favorites. I've mounted each panel with a black cardstock and then a green pattern paper which has been embossed. On the right side I present the smiley little caterpillar who hovers over the left panel. His leg slips in under one of the flower petals and that allows the card to be closed. The flowers are hearts connected by a yellow flower center and all have been embossed. I added a yellow button on the flower center, and Caterpillar has a sweet red jewel for her nose. The sentiment outside and inside are from Cutting Cafe. I am on hiatus from The Cafe but I love Regina's printables so much, they always make their way into most cards I create. The outside sentiment is from The Cafe's printable here: The inside sentiment that says "I hope you feel better soon" is from The Cafe's printable here.


TFL, hope you visited me from BBTB2 because the designers always have something delightful to share with you to leave you with some inspiration.

Monday, January 02, 2012

BBTB2/Ice Skates

Ballerina On Ice
Hello my dear followers. Happy New Year. I hope that each of you have a most wonderful 2012, a happy and healthy, safe and delightful 2012.

Heather has decided to step down as leader of Bitten By The Bug2. As you may know, Heather is a new proud grandmother and she will be taking care of her sweet new grandson, Blake. She has entrusted Donna Mundinger and I to take a sharing leadership of the blog. Donna and I are very excited. We believe that BBTB2 is a respected design team and we hope that we can inspire you to check in with our blog each week to see the wonderful cards from the design team members. Stay tuned because we are going to be doing a design team call in January.

Krista is our sweet hostess this week. She asked us to design with some ice skates. There are skates on many of the cartridges like Joys Of The Season, Christmas (Solutions), Celebrate With Flourish, Nifty Fifties....and quite a few others. For my skate cut, I selected Christmas (Solutions) and I just had to add the silhouette of the dancing skater from Winter Woodland (page 50). I added an embossed scalloped circle to mount the pair of skates upon, and I gave each skate a pretty blue ribbon that matches the ribbon on the skater. The snowflakes are MS punches. The dancer appears to be skating in front of a pretty window frame which is cut from Christmas (Solutions). And of course everything got a dose of embossing.

Thanks for looking... If you have come here from BBTB2 you will no doubt be inspired to make your own skate card.


Monday, December 26, 2011

Cutting Cafe Blog Hop

Hooray I have drawn the wining name: Margie of Bellabug Creations. I will have Regina get you the printable set immediately. Congrats...and thanks to all that participated in The Cafe's Blog Hop. Regina, that sweet sharing Regina, is offering up a free set of printables. We designers were allowed to select the set we wished to design with AND offer that set to any visitor who leaves a comment on each of our blogs. This is a blog hop so be sure to hop along to each designer and leave your comments. Here's the Cutting Cafe blog for your inspiration.

I chose "You're In My Thoughts Inside and Out" printable. There are mega choices on this set. Here is my card. I cut a Nestie opening on the front of my embossed blue card stock and I set the Nestie cut inside that has the sentiment. I surrounded the opening with sweet flowers and a butterfly, and a few pearls to enhance. The sentiment has been embossed as well.
Regina will post our designs on Wednesday, and I will do a drawing my comment section on Friday. So check back after 2PM on Friday and see if you are the winner. Thanks for looking.

Saturday, December 24, 2011

Merry Christmas

To all of my design team sisters, for all of my wonderful bloggy friends and to each follower who visits here...I wish you each a Merry Christmas and I pray that your new year will be healthy, happy and prosperous for each of you.
My son and daughter in law share my Thanksgiving, and they spend Christmas with her family in Connecticut. For 21 years I have always fixed a family recipe of my mother's called "Stacked Tacos" and this meal is shared with my Uncle Jack. For the first time in 21 years the tradition has been halted due to his passing on December 6. Tomorrow I will sew, and my day will be filled with memories to soothe my sad sad heart.
My Lorelie Lap Quilt is finally finished. I started this early last year but last week I finally picked up the blocks and created this small lap throw. It's a bright and cheery fabric with darling Lorelie designs that I toned down with black and white fabrics of all patterns. I love this little quilt....

Merry Christmas one and all...

Sunday, December 18, 2011

Cutting Cafe/Rain Rain

THESE BOOTS!
It is me...back again. I took a wee break to get myself settled down and take care of things that I had to get through. My Uncle Jack passed away December 6th and life has been a series of weeping, anger, a struggle to understand all things .. In addition to feeling the void of my Uncle not being in my daily life, I felt the loss of mojo to create. Our Inspiration Post for Cutting Cafe on December 19 is from The Cafe's Rain Rain Go Away printables. Such a cute cute set to work with and as it so happens, I woke to rain this morning. Here is my card for the post.
I put the base card layer and the white mount through my Cuttlebug embossing folder as well as the Cafe's printable and the darling little rain boots. I added a CK Edge Punch, and some cute little red jewels for the flower centers. Hope you will take a peek on Wednesday to see the design team's contributions for this inspirational post at The Cafe.


Saturday, December 10, 2011

Neglectful me...

I don't think I have ever neglected my wonderful blog like I have recently. My cherished Uncle Jack passed away on December 6th and I am busy doing all the things that a niece can do in such a sad time. I'll be back, my friends.... don't stray from me.

Saturday, November 26, 2011

Sewing Seams

A rag quilt has great personality with the little blocks and frazzled and frayed seams sticking upward into the quilt top. Making a rag quilt "by hand" means sewing seams together so the seams are on top, not beneath the project and then when that is all done, you begin the process of clipping a hundred gazillion snips to make fringe on each exposed seam layer. It's a hand breaker and most of the time my hands feel like they have been hammered. Thankfully I have an Accu-Go quilt die machine and delight of all delights, one of the die cuts (yes, just like Sizzix only bigger) is a rag quilt die cut which amazingly enough cuts every single little fringe piece on all 4 sides. I used sheeting for my quilt backing and actually to achieve a wonderful "matching" I ran the denim block and the sheet block through the die cut at the same time. This little wonderful Accu-go can cut about 5 layers of fabric at once. Once the 2 layers have been die cut, then you sew a big X from point to point which anchors the two fabrics nicely. When the stack has been done,the next process is to sew those fringed seams together with the fringe on the right side. It gets a little tedious trying to make the little fringes behave, to make sure each snip stands up and is not sewn into the seam. Actually at this point you are sewing 4 layers of fabric, and you sew your seam just about 1/2 or an inch beneath the clip of the fringe. I use a small stitch on this process. And most importantly, it is very easy to have a little fringe escape and get sewn in the backside. Rip out time.... When the intended rows of rag quilt blocks have been sewn together, then you sew one row to the next and you continue this process until your quilt has been assembled. The backside is nice and neat with lined up seams and pretty fabrics, the top side is a jumble of cute blocks and fringe. Next is the fraying process which is done in the washing machine....and cotton, denim...they fray like champs. Warning: your washer will be a hotbed of frayed threads and clumps. I remove the quilt, clean out the washing machine, and then I take the quilt in the backyard and shake it about 10 times. After the quilt is dried, you have....voila'....a cute frayed rag quilt. Thank heaven for my Accu-Go because otherwise....there would never be a rag quilt creation in this sewin' gal project bin.
Kuddos to my friend LeAnn who brought me the old levis to work with.

Friday, November 25, 2011

Cutting Cafe BOGO Sale

I always chuckle when I see the word "BOGO" and I have to stop and think..... it's a wonderful little silly word that means..."buy one, get one"... and if you stop by Cutting Cafe right now, you will see that Regina is having a BOGO sale. If you buy one of her darling printables, you get one free.. How's that for a deal. Here is the link:

Sunday, November 20, 2011

Cutting Cafe/December Delights

Oh how I love Cutting Cafe. You can see the shop right here. Regina's shop has endless choices for all themes and occasions. Our inspiration post at Cutting Cafe blog this week is such a fun group of sets to design with.
We had a choice of December themed images and printables. I selected two: I fussy cut the darling penguin and his cute little red hat. The hat has 3 red jewels added because of course any design conscious penguin wants a wee bit of bling. You can view the Penguin set right here. For my second choice, I printed the 3 calendars from December Daily Numbers Sets.
The top most calendar has been set on an embossed Nestie cut...I've embossed just about everything .... I added a wee star (Don Juan, page 28) ..the center of this sweet star has a gold jewel. I punched a circle, and then a smaller circle so I could highlight the Christmas date of 25.

Regina will post the inspirational projects on Wednesday so be sure to visit the site right here and you will delight in the designs offered. Thanks for your visit.... we are getting nearer to the day of Christmas celebration and I hope that each of you have a safe and wonderful holiday.

Sunday, November 13, 2011

Cutting Cafe/Thanksgiving Set

Thanksgiving is one of my most favorite holidays because my son and daughter in law come home for our celebration of the holiday.

Our inspiration post on Wednesday November 16 at Cutting Cafe is featuring a wonderful set called Thanksgiving Day. It has so many fantastic images and printables to make those cards to send to family and friends. When I see this set, I always head for that precious little turkey fella all dressed up in his top hat. Here is my card for the inspiration post.

I printed off the backgrounds for Happy Thanksgiving and Gobble Gobble. Those have been section into two different layers. I embossed and mounted the printables on brown and cinnamon cardstock. I put a black cardstock layer on the white base card, added a brown and white plaid ribbon. I added a second layer of embossed white cardstock. The little turkey fella has been colored in with my Copics. I have a hard time coloring with my hand problem but I hope turkey fella is presentable. I added a ribbon and the gobble sentiment was cut from my Stamped Cricut cartridge.
This is sort of a preview of my take on the inspiration challenge, but I hope on Wednesday you will pop over to the Cutting Cafe blog and take a peep ...er peek at the design team cards and projects. I think we are a pretty awesome group of gals with great ideas. Working with Regina's printables is fun and the cards we can create are pretty awesome. Thank you for visiting my blog.

Wednesday, November 09, 2011

Cutting Cafe/Christmas Sentiments

Regina's new Cutting Cafe set called Christmas Sentiment Shapes is awesome. It creates a quick and so easy printable that gives you an immediate holiday card. Just add a few little embellies and you have something wonderful to share with someone.
I selected the Tree and the cute Stocking for my two cards. The printable has a shadow cut as well but I opted to just design with the basic tree and stocking and then I added some jewels, ribbons, stars. The base card has been embossed with a dotted embossing while the Nestie mount under the printable has been embossed with a Sizzix holiday greeting. I added a plaid red ribbon and a red and white polka dotted ribbon. The stars are Sizzix die cuts.


Here is a highlight of the tree shape. I added some zig-zag red jewels down the treet.
This features the cute Christmas Stocking. I added a star and a ribbon. The tree and the Stocking have been embossed as well.
The printable from Cutting Cafe will let you design some wonderful cards for your family and friends. You can see the set right here. Thank you for visiting me and if you've left a comment, I appreciate it so much because as you know we bloggers glow when we get some feedback on our creations.

Sunday, November 06, 2011

Cutting Cafe Inspiration/Jot It Down

Our Cutting Cafe inspiration this week is from the Jot It Down printable series. This set will allow you to design so many different projects. I made a small little scrapbook of sorts.... with a few pages for notes, and places to add some small photographs that you cherish.

I selected a 12x12 double sided paper and I cut the sheet in half. I folded each half and stacked them which gave me 8 pages to design on. I added two eyelets and threaded lime green ribbon through to bind the sections together. The front of the little scrapbook has a rubber stamp title.

This is a stand up view. Isn't it wonderful when the backside of your paper is as pretty as the front side?
I've added some of the wonderful printables. This view of the two pages side by side will allow some cherished memory notes and a small photograph.
Another area to write some notes. I've added a punch heart, and Nestie mounts.
I think these two pages would be wonderful to add some photographs.
That's it... my little quick and easy creation using the Cafe's Jot It Down. You can see that set right here ...and be sure to check the Cutting Cafe inspiration blog on Wednesday. The design team will have some wonderful things to inspire you.

Sunday, October 30, 2011

Cutting Cafe Inspiration/Circle Sentiments

Our inspiration post at The Cutting Cafe Blog this week is to design using big sentiments. I love them all and it is always hard to settle for one. I decided to use the big sentiment for the baby set right here. Here I am again, making a door hanger.
I used my Cricut to cut 2 big circles with my double sided papers. (There are circles on many many cartridges, but I used George and Basic Shapes to cut my two.) Then I sit for 10 minutes trying to decide which side of the paper to show. That's the hardest part of making my card designs.... All 3 layers have been embossed with the Swiss Dots Cuttlebug. I added a small round and square EK Success Punch and then I mounted the precious little Onesie on top.
I've added groups of flowers in white and pink around the whole design. I used my Crop A Dile to place a brad and I strung bright green ribbon through for the ability to hang from a door knob or on the wall. Be sure to check out the Cafe's Inspiration blog on Wednesday. You'll see some wonderful things, I promise.

Saturday, October 29, 2011

Cutting Cafe Giveaway

That awesome Regina at The Cutting Cafe is offering FREE printables. You cannot pass this offer up. The free sets are available until November 2 2011 at Midnight. Hurry on over and get these darling sets. You can read all about it here.

Sunday, October 23, 2011

Cutting Cafe Inspiration/Think Pink

October is Breast Cancer Awareness Month
Our inspiration post on the Cutting Cafe blog this week is from the Think Pink breast cancer printables. I've made a lot of cards using this wonderful set.....
I fussy cut that beautiful pink ribbon that has been dotted with printed flowers. The ribbon has been embossed. The base card mount has been embossed with a delicate floral design (Cuttlebug), the printed "hope" has been cut with a square scalloped Nestie, embossed with Swiss Dots folder and mounted on a pink cards stock. I've Nestie cut one of the round sentiments from the set, embossed it, pop dotted it on the card and added a darling little pink paper ribbon. My friends all know that if they get a present and it was wrapped with a wonderful ribbon, give it to Carole. And so it was with this beautiful pink ribbon that adorns the card as a final effect. I love this card... I hope you will take a peek at the Cutting Cafe blog here and just take a look at the fantastic inspiration from our design team.

Thursday, October 20, 2011

Cutting Cafe You Is

Regina at The Cutting Cafe has a wonderful new printable (but aren't they all wonderful?)...and it is called "You Is". It is from the book/movie "The Help". Honestly, I think I may be the only person I know that has not read the book or seen the movie and my friends are raving about both. Until I move to that venue, let me share with you my take on the darling printable set. There are many options to select in this set, but I chose the larger square sentiment. I love making door hangers or signs and this is my creation.
I mounted the sentiment several times on different colors of papers and I've edged several layers with an EK Success Edge Punch. The round sentiment was put at the top of the sign and adorned with a MS layered butterfly and a MS tiny turquoise jewel. I've embossed the upper layers. I love this hanging sign.
Thanks for taking a peek and please visit The Cutting Cafe right here to view this wonderful printable.

Sunday, October 16, 2011

Cutting Cafe/Boxes

Our Cutting Cafe Blog inspiration post this week is centered around the wonderful array of box sets that Regina offers...and with all the cute options, it is really difficult to settle for just one creation. So.... as you can see, I've tossed in a few different designs with box sets.

This is a view of 3 different sets:
Ah, I love Halloween designs. These darling little boxes decorated with a bat and a ghostie are just the ticket to give little Halloween candies to friends. The two die cuts are Sizzix cuts, the little bat has been cut twice and lifted, and ghostie has 3 layers that are pop dotted. I put some jewels on each box for a bit of Halloween bling. I know my friends will gobble up the candy and keep the little boxes. This little set came from Tiny Box with sentiments...and you can see that set right here.
I sound so silly when I hear myself saying "oh this one is my favorite".... I guess I should admit that is true for the single moment. But I do love this darling little Tooth Fairy set. You can view that right here. I created a small box and decorated it with butterflies which are punched from a MS punch ... the inside of this box has tiny little envelopes that can hold those precious baby teeth. I've tied the bundle with a sweet yellow ribbon.
This is just a simple box pattern that has double sided paper, a scalloped mount that has been embossed and some punch stacked flowerettes with jewels in the center. I love putting a new paperback in one of these boxes for a gift.
Please visit The Cafe blog on Wednesday when Regina posts our inspirational endeavors. There are so many talented design team sisters who create awesome cards and projects for your inspiration.